今天终于下定决心尝试把项目部署到服务器,因为之前总是犹犹豫豫,总觉得好麻烦。对于学前端的我,这些东西真的好难弄,几乎弄了一整天,不过看到成功的那一刻,心里还是很高兴。
下面开始部署。
购买阿里云服务器ECS
配置选型


大家根据喜好选择吧。
如果购买成功,应该会受到短信通知,内含(实例名称,公网ip,系统用户名root)等。若没有设置实例密码,需要去控制台设置。
下面是我的选择
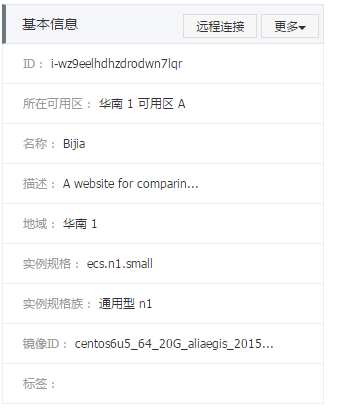
创建linux实例
- 登录云服务器管理控制台
- 定位到 云服务器ECS > 实例
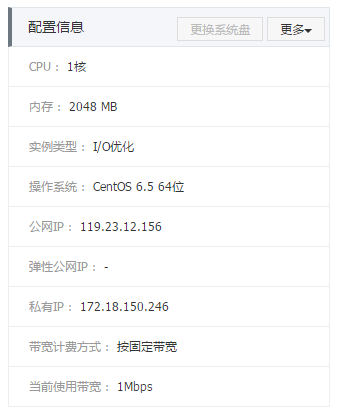
进行相关配置。
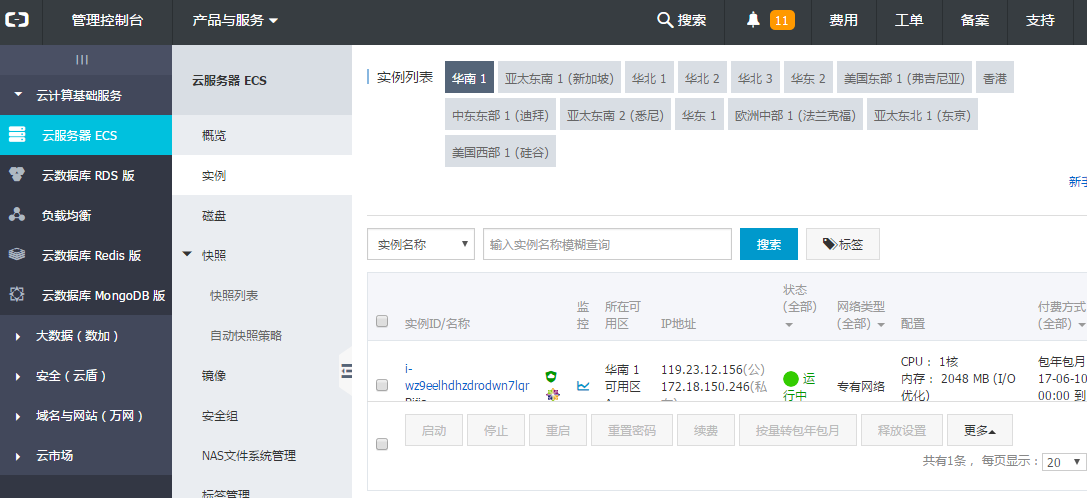
远程连接 Linux 实例
- 登录云服务器管理控制台
- 找到需要连接的实例,在操作列,单击远程连接。
- 连接管理终端
如果第一次连接终端,会弹出一个有密码提示的对话框,
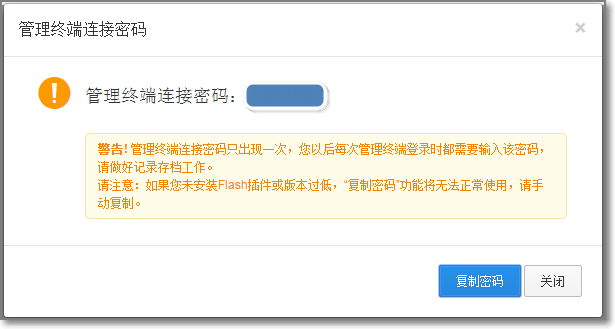
记住出现的密码,因为以后连接都需要输入。
如果不是第一次连接,就输入之前记住的密码。
除了用控制台连接终端,还可以使用putty来连接。
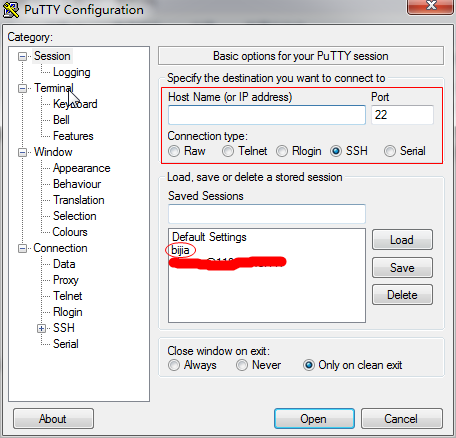
- 输入用户名root和密码
用户名是root,而密码是创建实例时设置的密码。
参考文章快速入门linux
CentOS 6.5安装nodejs
说实话,现在的我是不清楚需不需要这一步的,不过我觉得装了node.js总比没装好。
创建ECS实例
之前我们已经创建好了,使用root用户登录实例。
部署node.js环境–二进制文件安装
wget命令下载Node.js安装包
1
wget https://nodejs.org/dist/v6.9.5/node-v6.9.5-linux-x64.tar.xz
解压文件
1
tar xvf node-v6.9.5-linux-x64.tar.xz
创建软链接,使node和npm命令全局有效。
1
2
ln -s /root/node-v6.9.5-linux-x64/bin/node /usr/local/bin/node
ln -s /root/node-v6.9.5-linux-x64/bin/npm /usr/local/bin/npm查看node、npm版本
1
2
node -v
npm -v
如果部署成功,在终端能够成功显示node和npm的版本。
参考文章部署Node.js项目(CentOS)
Cent OS安装Nginx
准备编译环境
- 系统版本说明
1
cat /etc/redhat-release
显示我的系统版本是CentOS release 6.5 (Final)
- 关闭SELINUX
1
sed -i 's/SELINUX=.*/SELINUX=disabled/g' /etc/selinux/config
1 | setenforce 0 |
安装Nginx
- 下载源码包解压编译。
1
2
3
4
5
6
7
8
9
10
11
wget http://nginx.org/download/nginx-1.10.2.tar.gz
tar xvf nginx-1.10.2.tar.gz -C /usr/local/src
yum groupinstall "Development tools"
yum -y install gcc wget gcc-c++ automake autoconf libtool libxml2-devel libxslt-devel perl-devel perl-ExtUtils-Embed pcre-devel openssl-devel
cd /usr/local/src/nginx-1.10.2
./configure \
在输完上面最后一句话后,输入以下
1 | --prefix=/usr/local/nginx \ |
然后
1 | make && make install |
- 添加SysV启动脚本。
1
vim /etc/init.d/nginx
然后添加
1 |
|
赋予脚本执行权限
1
chmod +x /etc/init.d/nginx
添加至服务管理列表,设置开机自启。
1
2
3chkconfig --add nginx
chkconfig --add nginx启动服务
1
service nginx start
在这一步的时候我遇到了一个问题
1 | [emerg]: getpwnam(“nginx”) failed |
解决方法如下:
1 | useradd -s /sbin/nologin -M nginx |
重新启动,访问ip地址,可以发现nginx启动成功。
参考文章搭建 nginx + mysql + php-fpm 环境(CentOS 6)
文件上传
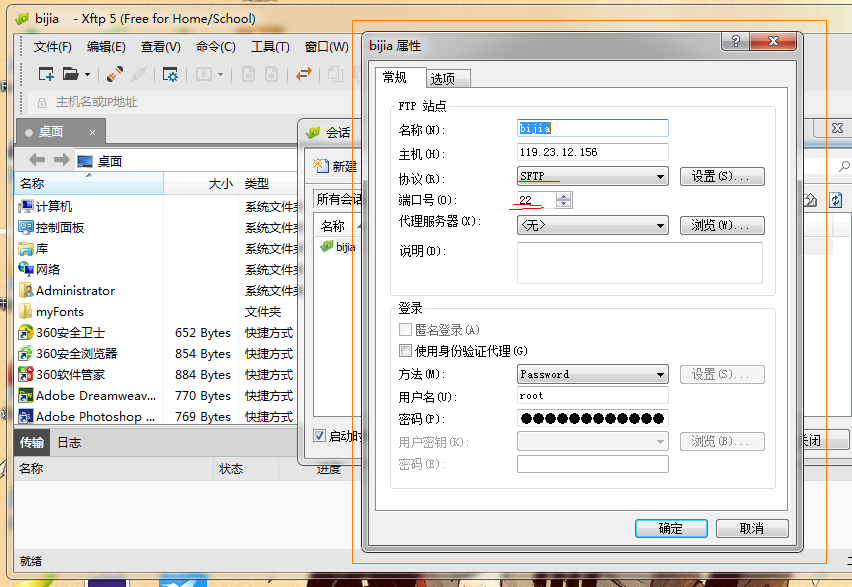
不知什么原因,我使用FileZilla一直连不上,然后使用xftp竟然奇迹的连上了。
nginx配置
首先我把自己的vue.js使用webpack打包,生成dist目录
1 | npm run build |
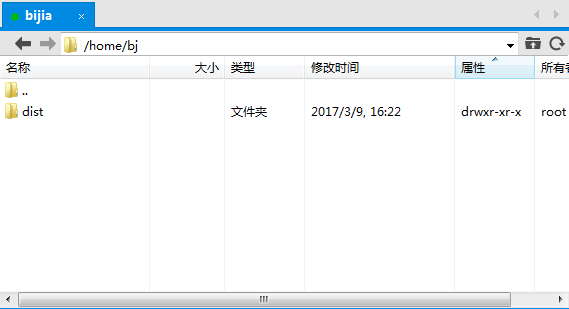
然后我在远程服务器上的home目录下建了一个名为bj的目录,把dist目录放到这个目录下
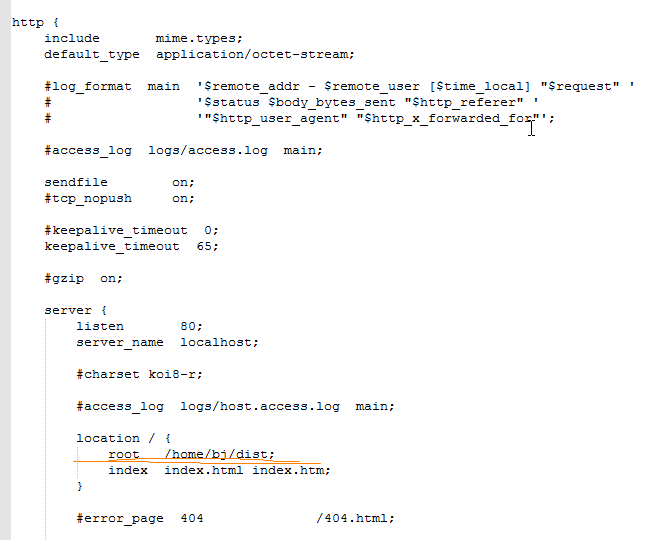
修改目录/etc/nginx/下的nginx.conf文件。
找到http模块的server模块,修改location信息
最后访问我的ip: 119.23.12.156,效果如下

当然,这只是我做到一半的东西,上传文件也只是为了测试用,后续会继续完善项目。
总结
效果出来的那一刻,我真的很开心!后续的话可能会买个域名,正式上线。